Copyright © 2017 Lab-Ally LLC
Uploading a Digital Signature Image
1) Once you have logged on to the Web Client as an Admin, navigate to Access > Users > Create User, and Create a New User
TIP: The admin can use this oppritinity to verify that this image matches the User's actual ink signature.
2) Select "Choose file" and upload the desired image of the user's signature

TIP: Use a .png, .jpg, or .jpeg image for best results. Some .tif files are known to cause issues.
Using a Digital Signature Image to sign your own document
1) Create a notebook page or file.
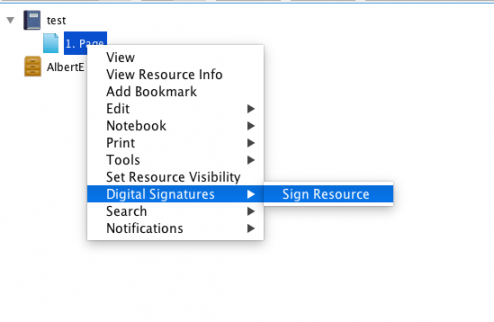
2a) Right click on the file in the document tree and select Digital Signatures > Sign Resource

OR
2b) If you are signing a notebook page, select the pen icon from the toolbar

3) A dialogue box will appear, select your Cosigner and hit OK
TIP: If you get an error check the digital signature workflow of the collection. The signature workflow is set when the collection is created and it cannot be changed. You may need to have 2 or more qualified Cosigners in your workgroup to sign a document.

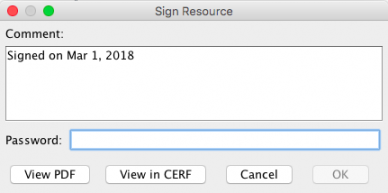
4) Another dialogue box will open, type your password and hit OK

TIP: If the OK box is unclickable, select View in CERF, your server's business policies may require that the Resource cannot be signed unless you view it in CERF.
5) Once the other Cosigner(s) sign the Resource, the signatures will be viewable on the printed copy of the Resource and in the Resource Info Window.
Using a Digital Signature Image to sign another User's document
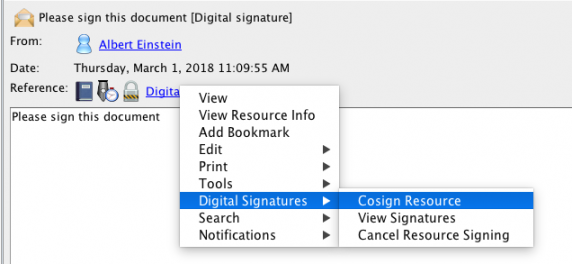
1) This will occur after someone has made you a cosigner. The following notification will arrive:

2) Right click on the reference and select Digital Signatures > Cosign Resource:

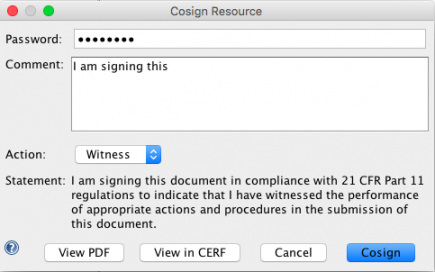
3) A dialogue box will appear, enter in the password, and a comment, then select Cosign.

TIP: If the Cosign box is unclickable, select View in CERF.
4) Now if you right click the reseouce you just signed, and select Print > Print to PDF
TIP: You must be an Editor in the workgroup to be able to "Print" the file.
5) When you print to PDF, the digital signture name, image (if applicable - notice how divya1 has that space blank because they have no image), date/time, role in Workgroup and role in signing will appear at the bottom of the page

